Green Screen in After Effects
Today will mostly be a work day for the final project, but there are a few more techniques I’d like to cover before we wrap things up.

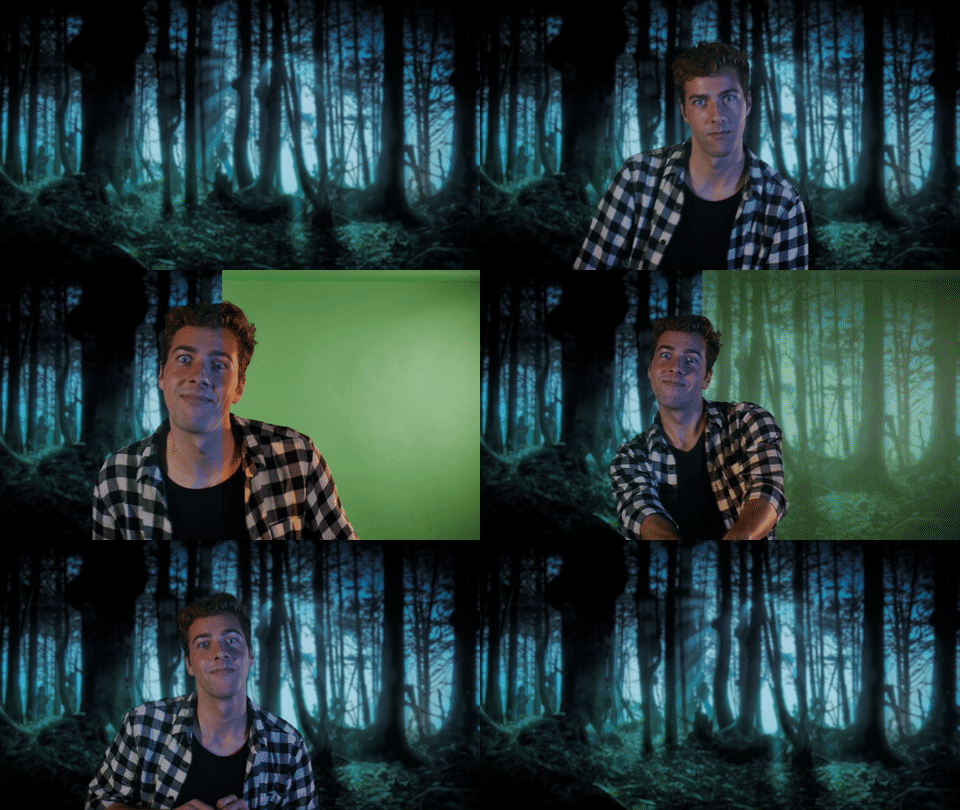
A few of you have asked about how to work with green screen footage. Green screen footage can be composited in either Premiere Pro or After Effects. The process involves removing the green areas of the screen and making them transparent. You can then drop different footage behind the green screen footage. For example, you could remove the green background from footage of an actor and place them in a different environment.
In each program, there is an entire category of effects called “Keying.” In After Effects, use the Keylight effect from this section. Keylight has a lot of advanced functions, but here’s how to get results quickly: add the effect to the green screen clip, click on the effect’s color picker in the Effect Controls panel, and click on the green area of the footage. You should see an immediate change.

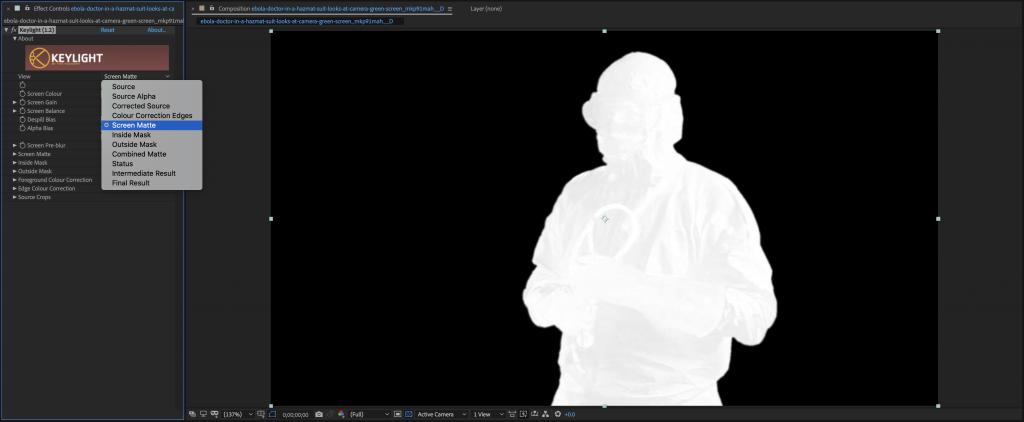
Although the results may look good after that first click, it’s worth looking more closely at what’s happening. Under the View options, switch from Finished Result to Screen Matte. This will switch you to a high contrast black and white view. The black areas are what After Effects has identified as the green screen and will be taken out; the white areas are what will be left. Your goal is to remove all grey areas from the image, in order to get the best key possible. Under the Screen Matte section of the effect, you can adjust Clip Black to clean up problematic sections of black and Clip White to clean up problematic sections of white. You can also adjust Screen Shrink/Grow to expand or contract the affected area and Screen Softness to blur the edges a bit. There are many more factors that can be tweaked, but these should be enough to give you a pretty good result. Once everything looks good, switch back to the Final Result view mode.

With your green screen footage successfully keyed, you can drop a new background behind it. For the most realistic results, try to match the angle of view in your original footage. You may also want to do some color grading on one or both layers of footage to get them to match. In order to really blend them together, you can even add an adjustment layer and apply a color grade to both pieces of footage simultaneously.

Green Screen in Premiere
There are lots of chroma-key effects in Premiere, in the Keying folder. I’ve gotten the best results by far using Ultra Key. Just like in After Effects, you’ll need to choose the Key Color using the eye dropper. There may be some variation in the color of the screen – try to click on a section that’s saturated and fairly close to the subject. You should notice an immediate effect after choosing the Key Color.
You’ll want to switch your view (under Output) from Composite to Alpha Channel to see how effective the key actually is. This will switch your view to a black and white silhouette – black areas are keyed out and white areas will remain. Your goal is get get rid of all grey areas and get an Alpha Channel view that is purely black and white.
Sound familiar? To do this in Premiere, adjust the parameters under Matte Generation. There are several sliders to play with; I’d honestly recommend going through them in order and seeing how they affect the image. I generally have good luck adjusting the Highlight, Shadow, and Pedestal. You should be sure to occasionally scrub through the footage, to make sure that the lighting situation doesn’t change during the shot.

Once your Alpha Channel image looks good, switch back to the Composite view – the subject should now be neatly isolated against a black background. If the edges of your subject look rough, try modifying the properties under the Matte Cleanup area of Ultra Key. Choke will expand or contract your keyed area, while Soften will blur the edge – this can make your key look more natural.

Live Linking
We’ve been using After Effects and Premiere independently of each other and that’s fine – you can always export something from one program and import it into another. However, because both pieces of software are made by Adobe, you can actually jump between them pretty seamlessly.
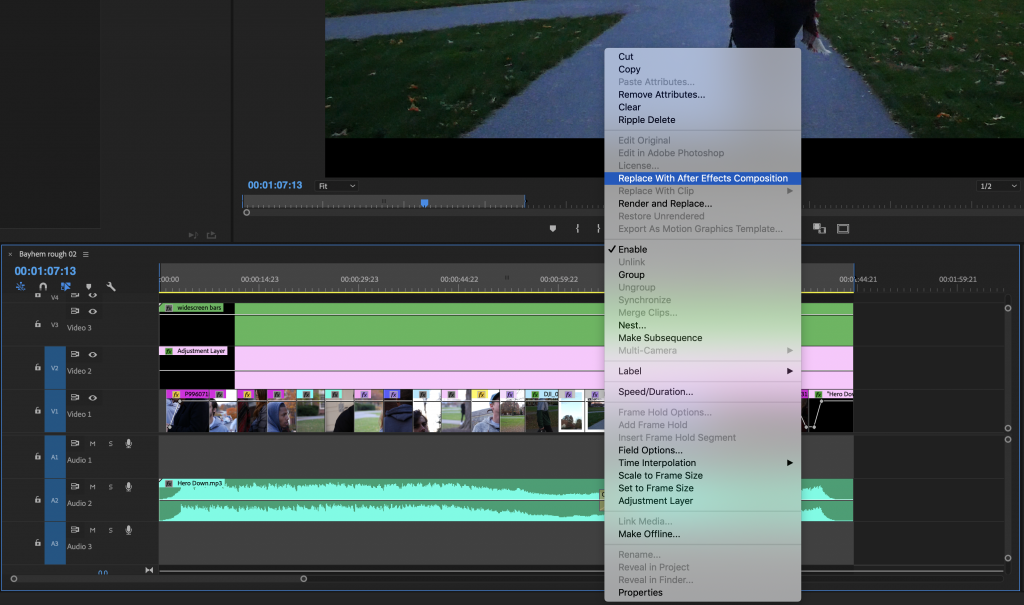
If you’re working in Premiere and decide that you want to edit some of the clips in After Effects, simply highlight them, right-click, and choose Replace with After Effects Composition. The highlighted clips will be replaced with a single piece of media called “Linked Comp” and After Effects will open.

Timelines in After Effects and Premiere work a little differently, but Adobe does a good job of replicating things. It will also carry over effects and alterations that you have made to the clips, if there is an equivalent in After Effects. As you make changes to the composition in After Effects, those changes will be reflected back in the Premiere project’s timeline – no exporting needed.

This is a great way to take advantage of both the editing efficiency in Premiere and the advanced effects features in After Effects. However, it should be noted that complex, intensive effects will start to slow down Premiere’s responsiveness, unless you’re on a powerful computer.
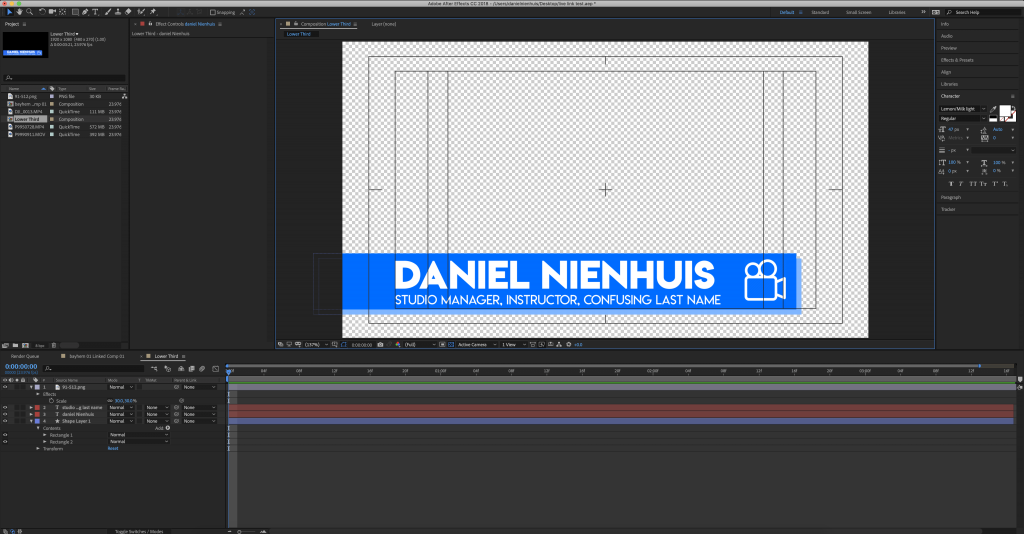
This project swapping works in the other direction as well: you can start with a composition in After Effects and move it into Premiere. This is especially useful for things like title cards and lower thirds graphics. After creating an After Effects composition, simply click and drag on it in the Project panel (the list of all your media and compositions) in After Effects to the Project panel in Premiere. You may need to rearrange your windows a bit to do this, but you should see the composition show up in Premiere, at which point you can drop it into your timeline like any other piece of media.

Just like before, any changes that you make to the composition in After Effects will be reflected in Premiere. Also, any areas of the screen that are transparent in the After Effects composition, will also be transparent in Premiere – whereas if you exported the video using the normal settings, they would be black. That’s why this technique is so handy for things like name graphics.
