Effects
Here’s some more media to work with, if you’d like to experiment as we go along. This week’s theme is puppies.
Now that you’re a bit more familiar with the After Effects workspace, we can start to look at some of the advanced options within the program. This week, we’ll focus on adding effects, creating and manipulating text elements, and blending layers together using transfer modes.
The list of effects can be found in two places. The first place is the Effects section of the top dropdown menu, which shows all of the effects grouped into categories. Simply go to the effect you want and click on it – it will be added to the selected layer and the Effect Controls panel should open. The effect will also appear in the layer information of the composition in the timeline. There is also an “Effects & Presets” panel (you may need to find it using the Window menu). This panel contains the same categories as the dropdown menu, but it also contains a search bar. So if you know the name of the effect you want, just start typing it into the search bar and all the possible matches will appear.
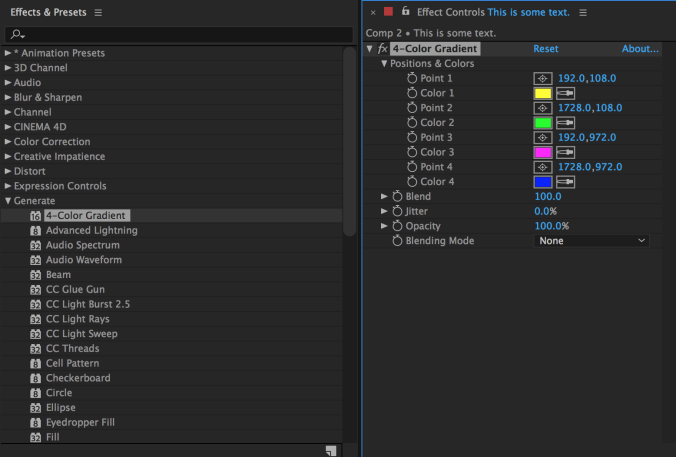
When you add an effect, that effect will appear in the “Effects” section of the layer’s properties in the timeline (under “Masks” and before “Transform”) and in the Effect Controls panel. The Effect Controls panel is best for getting your effect dialed in exactly the way you want it – many effects have specialized controls and elaborate options. The timeline window is best for refining and manipulating any keyframes that you add to your effects. Remember that you can show all the keyframes that have been added to a layer by pressing the U key.
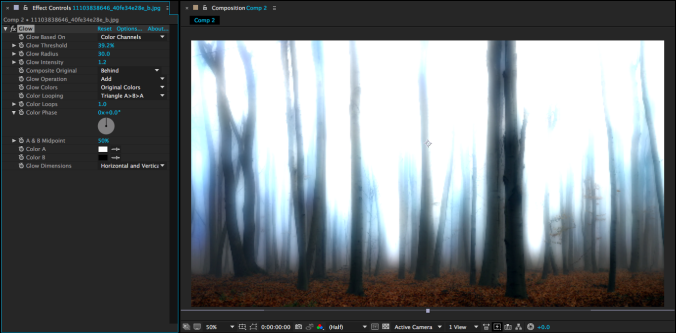
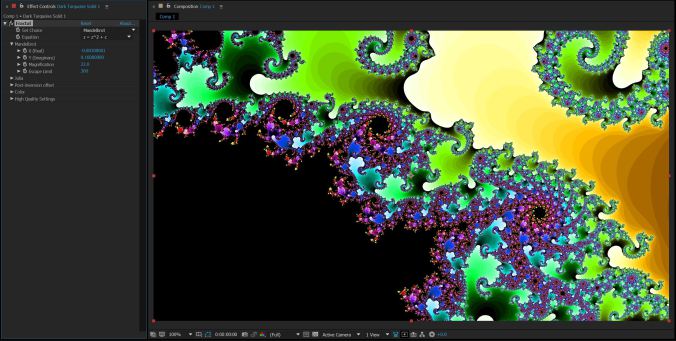
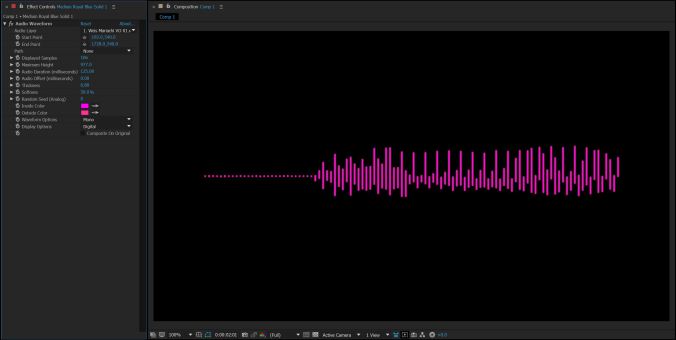
M-E-T
Most of the media you add to your composition can have three kinds of properties: masks, effects, and transform properties. You should be familiar with transform properties by now; they are the most basic keyframe-able properties of a piece of media, such as scale, position, and rotation. Masks allow you to cut unwanted areas out of a piece of media. Effects are used to modify the media in countless different ways. These three properties – masks, effects, and transform properties – are always applied in the same order: masks first, then effects, then transform properties.
You’ll find the mask tools up at the top of the screen in the tool bar. There are preset mask shapes (hold-click to see the various options) and a pen tool for custom shapes. Be sure to select the layer you want to mask in the timeline panel before clicking on a mask tool – otherwise, you’ll draw a shape instead of a mask.
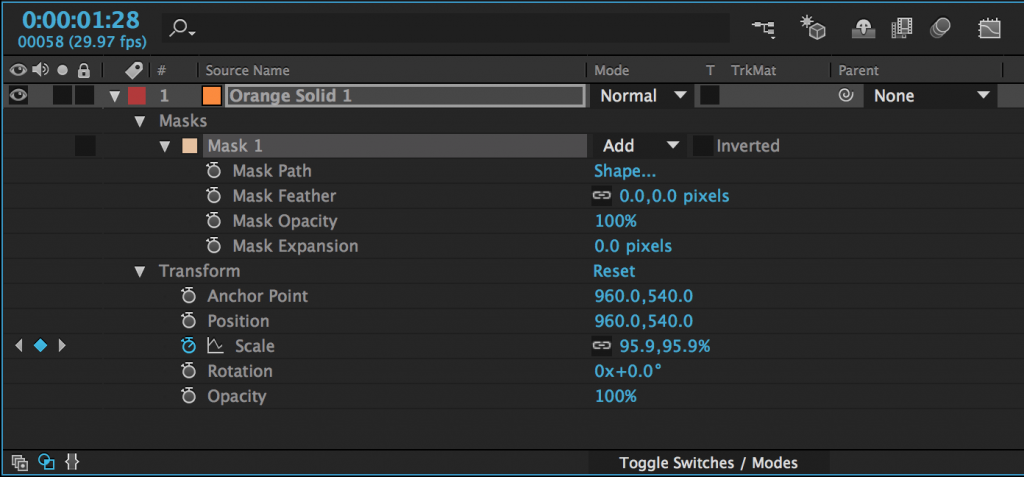
After you add a mask to an object (with either a shape tool or the pen tool), it will appear as a property of that layer in the timeline panel. Next to the name of the mask, you’ll find a dropdown menu – the default value should be “Add.” This means that the mask is “adding” that area and discarding everything else. If you change this to “Subtract,” the area of the mask will be taken away and everything else will remain. Choosing “None” will make the mask have no effect. There are several other options as well, but add and subtract masks are what you will use most of the time.
There are a number of options for further modifying the mask, which are available by clicking the triangle to the left of the mask’s name. “Feather” fades the edges; “Opacity” changes the transparency; and “Expansion” allows you to grow or shrink the mask.
Mask Path is the shape of the mask and by turning keyframes on for that property, you can animate that shape. When the mask path keyframes are activated, you can move the points that define the mask or adjust their bezier curves. If you click on the word “Shape…”, you can automatically change the mask to an ellipse or rectangle.
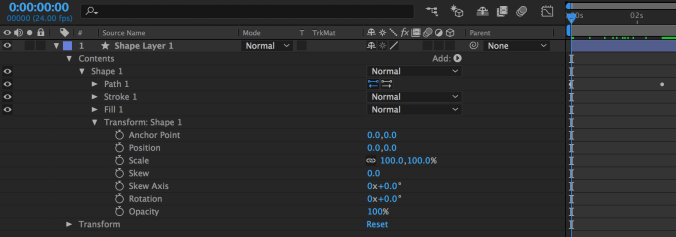
Shapes can be animated in a very similar way. If look at the properties of a shape in the timeline, you’ll see a new category called “Contents.” Under the shape’s name, you’ll find keyframe-able properties related to path, stroke, fill, and transform. “Path” allows you to animate the shape of the shape, just like the shape of the mask can be animated. Stroke and fill control the color of the shape and the color and thickness of its border. Transform is a second set of transform controls, applied to the shape before the regular transform properties are applied to the layer in general. There are a few extra properties in these new transform controls; they are related to the skew, or distortion, of the shape.
Text
In addition to media that you import, you can create layers to add to your composition from within After Effects. The most common are solids and text layers. To create one, go to the Layers dropdown menu at the top of the screen, select New, and choose Solid or Text. When you create a new solid, you’ll see a menu with options for name, size, and color.
You can create text in a composition either by selecting the text tool (Cmd+T on Mac, Ctrl+T on PC) or choosing Layer>New>Text from the top dropdown menu. You can either draw a box for the text in the composition window or just click somewhere and start typing. You can also double-click on the layer in the timeline window to begin editing the text.
The “Character” panel in After Effects contains all the usual options for modifying text, as well as some unique controls. You can change the typeface, size, fill color, stroke, and style; but you can also adjust the kerning and line spacing, add a faux bold or italics, switch to all-caps or small-caps, put text in sub- or super-script, and more. You can highlight just part of your text and modify its properties separately. There is a different “Paragraph” panel for adjusting the justification.
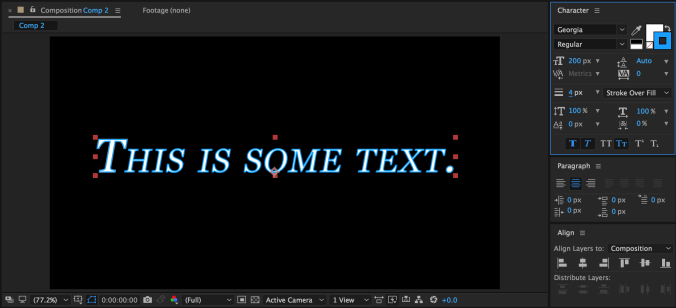
There are two text-related tools in the toolbar: one for horizontal text (this is what you’ll use most of the time) and one for vertical text. What if you want your text to run along a specific path, however? This can be achieved using the masking tools. With your text layer highlighted, choose either the pen tool or a mask tool and draw a mask or path. If you are using the pen tool (which is what I’d recommend), you do not need to close the path – you can simply create a line for the text to run across.
With your path drawn, click down to the “Text” section of the text layer in the timeline and find the “Path Options” section. Next to “Path,” you should see a small dropdown menu – it will say “None” by default. Open that menu and choose the path you’ve drawn – your text will snap to the path. Some options for adjusting the position of the text on the path will also appear.
Animate Text
As you can see, there are many ways of manipulating text in After Effects. However, there is a whole other category that we haven’t yet discussed: animation presets. There are actually animation presets for all sorts of things, but the text presets are particularly fun. To use them, you’ll need to go to the Effects & Presets panel; “Animation Presets” is the first option.
Within the Animation Presets category, you’ll see several subcategories. Go down to Text and open it up. There, you’ll see many more subcategories such as Animate In and Animate Out, Graphical, Mechanical, Organic, and lots more. Animate In and Animate Out do just that – they automatically animate the text moving on or off of the screen.
The other categories of animation presets add things like movement, graphical elements, or light effects to text. For example, the Flicker Exposure effect in the Lights and Optical category makes each character in a text layer randomly flicker. This is a fairly simple effect, but it would be very tedious to create it manually; the animation presets make it simple.
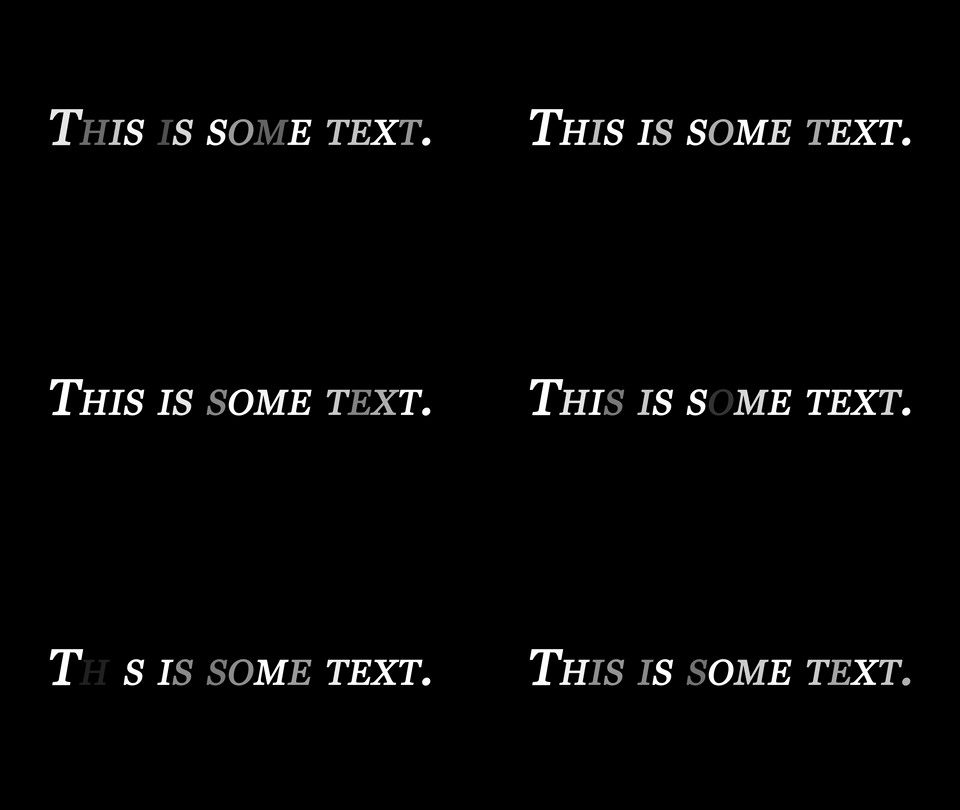
Many animation presets can be manually customized after they are applied. To do this, go back to the “Text” section of the text layer in the timeline – there should be a new section called “Animator” followed by a brief description. You can dig through the animator options to alter the animation preset, or highlight and delete it to remove it.
Transfer Modes and Track Mattes
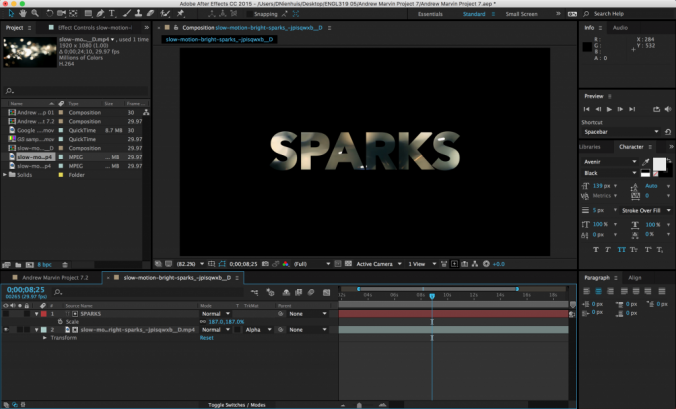
We’ve already spent some time with blend modes in Premiere; transfer modes in After Effects are basically the same thing. There is a “Mode” section of the timeline where this can be adjusted. You may need to hit the “Toggle Switches/Modes” button at the bottom of the panel for it to become visible.
By default, the transfer mode should be set to “Normal.” There are too many options to go through individually, but they are grouped together into sections. The section with “Darken” at the top uses the dark areas of the layer to affect what is visible; the section with “Add” at the top uses the light areas. You should experiment with the transfer modes to see how layers affect each other – you can get some really interesting results with them.
Next to the transfer modes are options for “Track Mattes.” A track matte tells a layer to look at the layer above it for certain properties. The “Alpha Matte” and “Alpha Inverted Matte” are particularly useful. For example, if you put a text layer above a video layer and then set the track matte of the video to Alpha Matte, the video layer will have the shape of the text layer. Alpha Inverted Matte will cut out the shape of the text.
Adjustment Layers
Adjustment layers are a very cool feature found in After Effects and some video and photo editing programs. Basically, an adjustment layer is a blank layer in the timeline. Any effects that you add to an adjustment layer will be applied to the layers beneath it. Any layers above the adjustment layer will be unaffected. This allows you to quickly apply effects to an entire scene. If, for example, you decide you want your composition to be in black and white, you can add an adjustment layer and apply the “tint” effect to it. Without the adjustment layer, you would have to go to each layer individually and apply the effect.
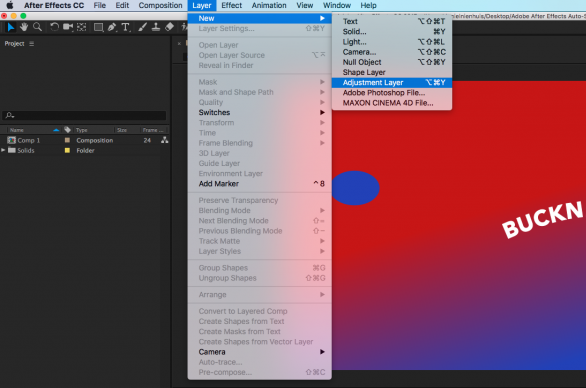
To create one, go the the Layer drop-down menu at the top of the page and go to New>Adjustment Layer. An adjustment layer the size of your current composition will be created and placed in the timeline. After Effects also lets you modify adjustment layers in interesting ways by using masks. For example, you can use a circular subtract mask on an adjustment layer to create a simple vignette. Note that while adjustment layers have transform properties, modifying those properties does not affect the layers below – only effects are applied.
If you do want to apply things like scale and rotation using an adjustment layer, it is possible, however. In the “Distort” section of the effects, there is one called “Transform.” This is a set of the usual transform properties – anchor point, position, scale, rotation, and opacity – that can be applied as an effect. If you add the transform effect to an adjustment layer, that effect will be applied to the layers below.
Slow In, Slow Out
The ability to keyframe and animate properties is probably After Effects’ most powerful feature; however, that animation may look a little stiff and unnatural at first. For example, if you use two “normal” keyframes to move a shape across a composition, the shape will begin moving abruptly, travel at a constant speed, and then stop abruptly. Sometimes, this is the desired effect, but it’s not how things usually move in the real world. Fortunately, After Effects makes it simple to make animation more natural and dynamic.
By default, keyframes in the timeline are diamond-shaped. This is a standard “linear” keyframe. If you right-click on a keyframe and move down to the “Keyframe Assistant,” you’ll see three “Easy Ease” options: Easy Ease, Easy Ease In, and Easy Ease Out. Easy Ease Out “eases out” a property, meaning it will start slowly and then build up speed. Easy Ease In “eases in” a property, meaning it starts fast and then slows down. Easy Ease is used for keyframes where you want a property to start fast, slow down, then pick up speed again. When you choose one of these options, the shape of the keyframe will change: Easy Ease Out is an arrow pointing left, Easy Ease In is an arrow pointing right, and Easy Ease is basically the other two icons combined.

Easy Ease sounds complicated, but it should quickly make sense once you start playing with it. It’s really an essential tool in After Effects; it makes animated properties – especially movement – seem much more natural. If you’re having a hard time with it, my general rule is this: use Easy Ease Out on the first keyframe in an animation, Easy Ease In on the last keyframe, and Easy Ease on the keyframes in between. If you aren’t sure what to use, the regular Easy Ease is probably your best bet.
If you want to switch back to a standard linear keyframe, you can command click on it and its shape will change. If it turns into a circular shape, command click on it again, until it is back to a diamond.
Pre-composing
When you create a new composition in After Effects, it appears in the project panel along with the rest of your media – that’s because compositions essentially are pieces of media, just like stills and video files. This means that you can drag one composition into another and then add effects, mask it, or manipulate its transform properties. In fact, it’s quite common to have compositions within compositions within compositions for a complex project.
In addition to dragging one composition into another, you can choose certain layers within an open composition and make a new composition out of them – without ever leaving the timeline you are working in. After Effects calls this “pre-composing.”
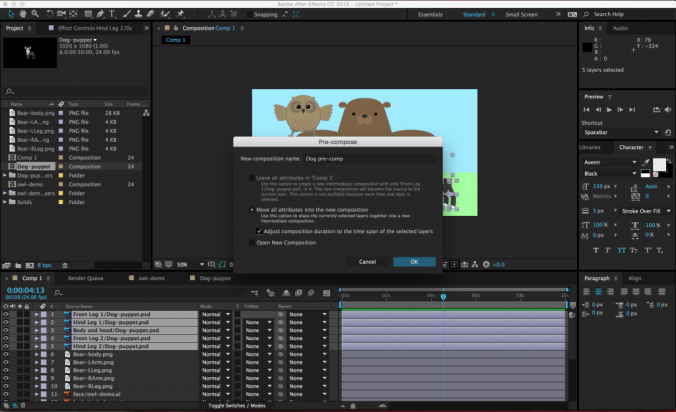
To pre-compose media in the timeline, select the desired layers (command-click to choose more than one layer), right-click and select Pre-Compose…. A menu will appear with options for re-naming the new composition (probably a good idea), leaving or moving the “attributes” of the layers (choose to move them), adjusting the length of the new composition (choose to do this), and opening the new composition (not necessary).
Once the layers have been pre-composed, the new composition will appear in the old composition as a single layer. It will also show up as a new composition in the list of project media. If you double-click on the pre-composition, it will open up in the timeline and preview windows. Pre-composing media is a great way to clean up a chaotic composition (sometimes you just have way too many layers in there), as well as a simple method of applying effects and transformations to multiple layers at once.
Parenting
Parenting is a unique feature in After Effects and it’s incredibly powerful. When you parent one layer to another, the “child” layer will be affected by the scale, position, and rotation of the “parent” layer. Parenting does not affect opacity, effects, or masks.
To parent a layer, you use the Parent section of the composition panel. You can either choose the parent layer from the drop-down menu or use the “pick whip” selector next to it (it looks like a little swirl). A parent layer can have multiple child layers connected to it – and a child layer can have its own child layers – but a child layer cannot have multiple parent layers. That probably sounds confusing, but it should quickly make sense once you start playing with it.
Parenting has some very basic and commonplace applications for things like lower thirds and title design. For example, you could parent a text layer to a solid layer, then animate the solid layer sliding into the frame. The text will keep its position relative to the solid and slide in with it. This keeps your animation consistent and means that you only need to keyframe properties on one layer instead of two.
Under the Layer drop-down menu, you can also create a “Null” object (Layer>New>Null Object). Null objects don’t appear to do anything at first, but they are very useful as parent layers. You can parent several child layers to a null and then affect them all simultaneously.
