Text In Space!
This week, we’re going to learn a really slick method of integrating three dimensional text into live footage. It’s the kind of effect that looks really complicated, but is actually fairly simple to pull off. It involves an effect called 3D Camera Tracking.

To start, we’ll need some footage to work with. This technique works the best with footage that has smooth, steady movement. Drone and aerial footage tends to work quite well, as do shots that were filmed on a gimbal, dolly, or crane. If you head over to Videoblocks, there is an “aerial” section that has lots of good options, but you can find usable footage lots of places – or film it yourself! I would recommend either using a fairly short clip or trimming down to only the section you want to use, since the footage will need to be analyzed.
Once you have the footage imported into After Effects, put it into a new composition. You can add the 3D Camera Tracking Effect either from the Effects & Presets panel or the Perspective section of the Effects dropdown menu. Immediately after adding the effect, you should see a notice in the composition window saying that the footage is being analyzed. Depending on the length and complexity of the shot, this may take a while. Once the footage is analyzed, you’ll see another notice that says “Solving Camera.” After a few more seconds, the footage will be ready.

When the process of analyzing the footage is done, you should see a number of brightly colored markers appear on the footage – if you don’t see any, click on the name of the effect in the Effect Controls panel. As you scrub through the footage, you’ll see these colored markers move along with the onscreen action. These markers are what After Effects uses to guess the three dimensional qualities of the clip you are working with.

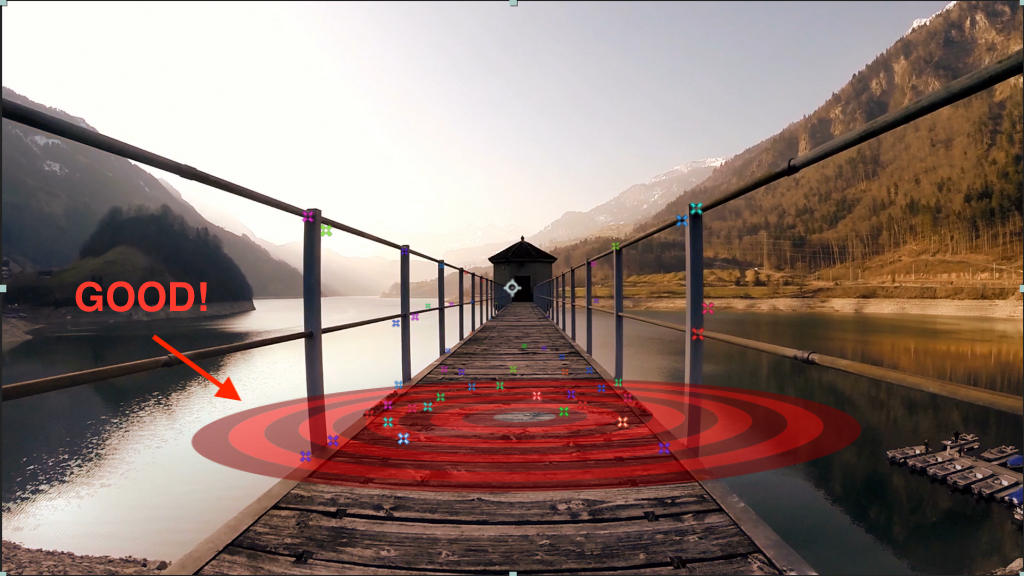
If you hover your mouse over the markers, you’ll see a red target appear in different orientations. This target represents a flat plane in 3D space that After Effects is generating based on the positions of multiple markers. In the example below, the program can tell that the pier is a flat object based on the tracking information. However, if the mouse is hovered over a different set of points, the red target will bounce around in strange directions. You want to click on a red target that looks like it fits within the geometry of the footage. In the next two images, the first target position is a good option, but the second is not. This process sounds more complicated than it actually is – once you have the footage analyzed, choosing an appropriate target is fairly intuitive.

With an appropriate target on screen, right-click the mouse and you’ll see several options appear. Let’s start with the first one, Create Text and Camera. Choosing this will create two new layers in your timeline – a 3D text layer (which just says “Text” by default) and a camera. If you look at the Transform properties of the camera, you’ll see that keyframes have been set on every frame of the composition. No keyframes have been set for the text layer – the camera is responsible for all movement in the shot.
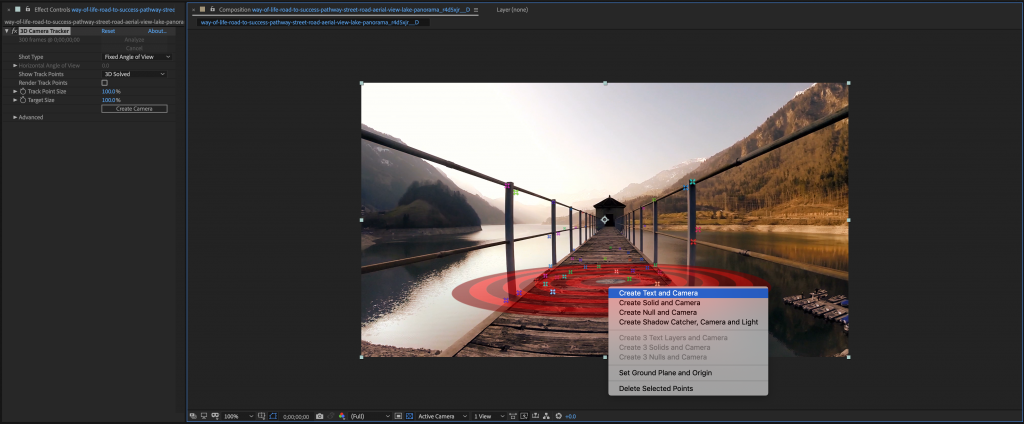
Essentially, After Effects has figured out the “shape” of the environment in the footage and the way a camera moved through it when the footage was captured. It then created a virtual camera that matches its analysis of the real camera that was used. When a 3D object is placed into the composition, the movement of the virtual camera will make it look as if the object were in the filmed environment.

Of course, this doesn’t always work well. If a shot has very chaotic movement or if the software can’t latch on to distinct tracking points, you won’t get a good result. However, for clear footage with smooth movement, it usually works very well.
Let’s get back to the example at hand. Double-clicking on the text layer in the timeline will let you edit it and you can use all the regular tools in the Character panel to change the typeface, size, color, and so on. Depending on how the 3D analysis went, you may notice that the size is a little funky – you may need to use a very large or very small number to get the scale appropriate.
You will probably also want to change the orientation of the text using the rotation options. When the text layer is first created, it has the same orientation as the red target. In the shot below, I’ve scaled it down and rotated it to face the camera – 90 degrees on the X axis and about 25 degrees on the Y axis. I’ve also moved its position up a little along the Y axis so that it floats over the pier.

If you play through the footage, you’ll see the text pass by the camera as if it were a physical object within the environment. One of the cool things about this effect is that you can move the text anywhere in 3D space that you like and it should still “fit” in the environment. If it starts to look off, you can always go back to the effect controls and choose a new target to create the text and camera from.

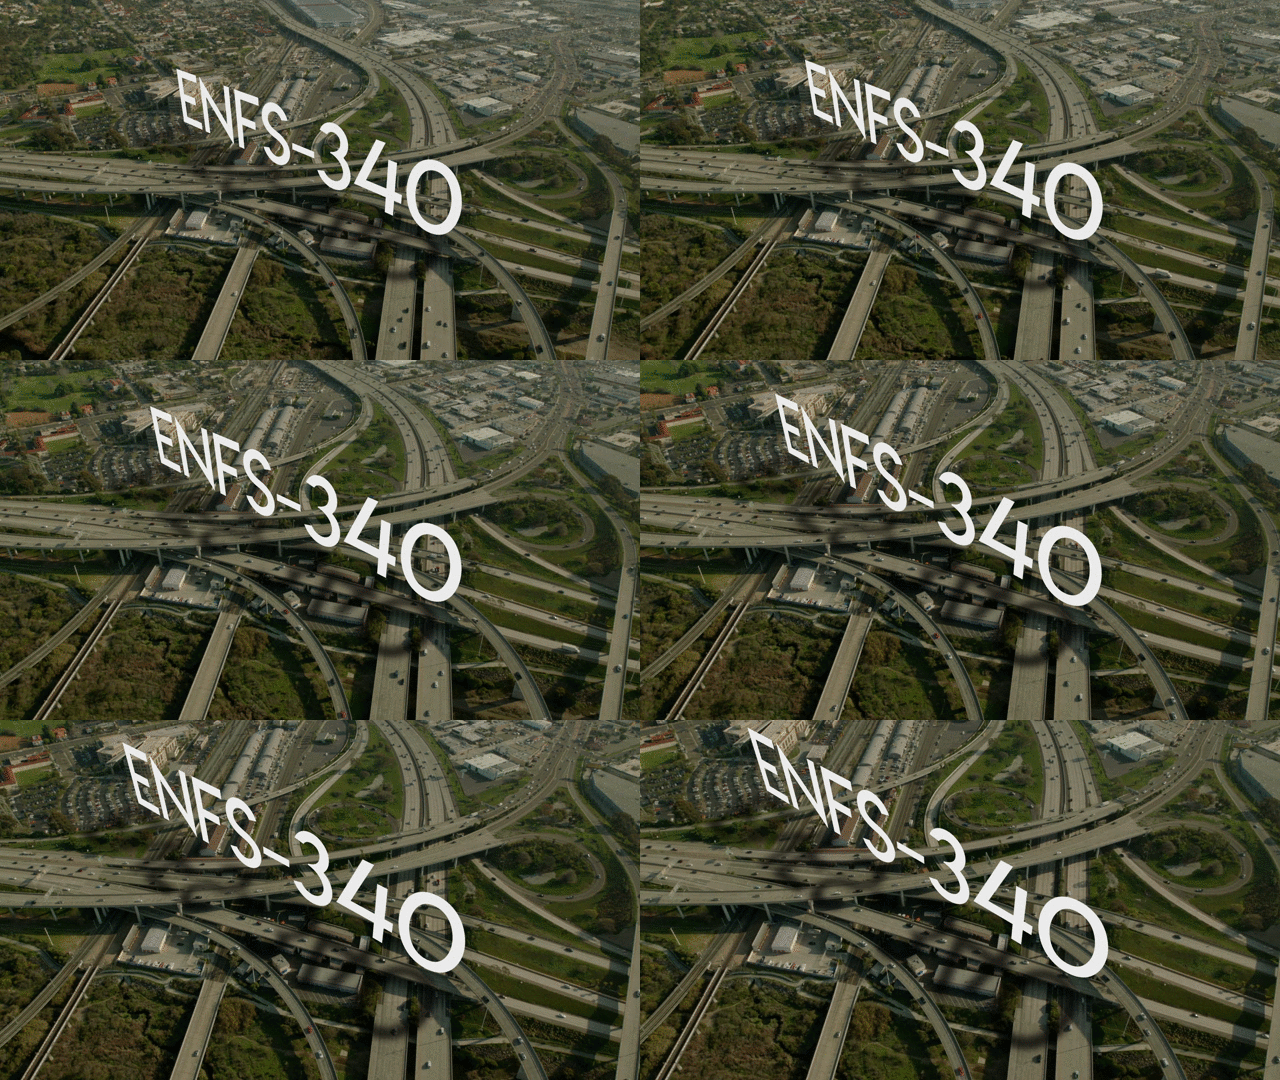
You can add a little more polish to your 3D text by adding a simulated shadow. In the example below, I’ve duplicated the 3D text layer, altered its color and transparency, added a blur, and rotated it. The resulting layer looks like a shadow being cast by the white text.

There are automated ways of creating shadows as well – there is an option to create a “shadow catcher” when you choose a tracking target. However, I find that the method described above is simpler and more effective most of the time.
Beyond Text
In addition to text, you can create a solid or a null when you choose a target for the 3D tracker. I’m not sure why you’d want to create a solid (it would just be a rectangle floating through space), but creating a null gives us some interesting possibilities.
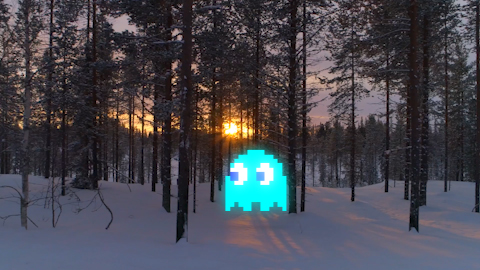
In the shot below, I chose Create Null and Camera instead of Create Text and camera (after analyzing the footage and choosing an appropriate target). Nulls are layers that aren’t visible when the composition is rendered – instead, they act as markers or links between other layers. After the 3D null was created, I dropped an image layer (a little Pacman ghost) into the composition and turned on its 3D properties. I then copied the Position coordinates from the null object and pasted them onto the new image. When I play the scene, the ghost floats along as it it were in the environment.

With a little additional animation and some effects, you get a nicely composited shot:

I’d like to take a moment to review an After Effects technique called “parenting.” We talked about parenting briefly a few weeks ago, but didn’t get much of a chance to explore it. Put simply, parenting links one layer to another in a sort of chain. If Layer 1 has Layer 2 as its parent, moving, scaling, or rotating Layer 2 will proportionately affect Layer 1. However, altering Layer 1 will not affect Layer 2 – a parent layer moves a child layer, but a child layer doesn’t move a parent layer. That may sound complicated, but it’s pretty simple once you try it.
To choose a parent layer for a piece of media, you simply select the desired layer from the Parent & Link dropdown menu in the timeline. Multiple layers can have the same parent layer, but each layer can only have a single parent.
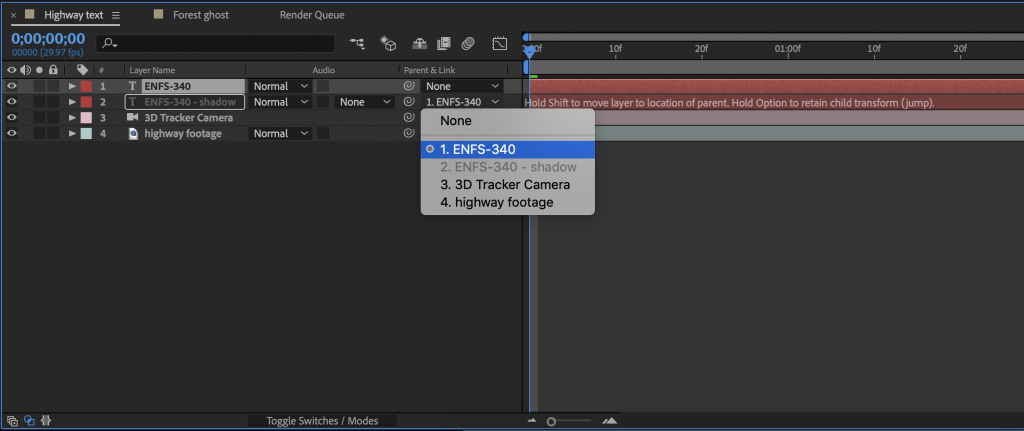
In our example with the text tracked over the highway footage from earlier, we can parent the shadow layer to the white text. This allows us to change the scale, position, or rotation of the text and simultaneously alter the shadow layer in proportion. Only having to make changes to one layer instead of two saves a ton of time.
Nulls are also great as parent layers. In the example with the ghost image in the woods from above, we could add multiple ghosts, parent them to the same null, and then move or scale them all together. You could even use it to animate multiple layers at once – instead of adding keyframes to each layer individually, you can add them to the parent null. This works in 2D compositions as well – just remember use 2D nulls for 2D compositions and 3D nulls for 3D compositions. The nulls created using the 3D Camera Tracking effect are 3D by default.

One other technique that we didn’t get to spend much time talking about is pre-composing. By this time, you may have noticed that it’s possible to place one composition into another in After Effects. When you do so, it acts as if it were one piece of media and only appears as a single layer in the new composition.
It’s actually possible to create compositions from within another composition, similar to the way that footage can be “nested” in Premiere Pro. You simply highlight the layers you want to be in their own composition, right-click and choose Pre-compose… from the menu. A new panel will appear with some options: you can rename the new composition (which you probably should) and you may be given the option to move or leave attributes – generally, you want to move them. Finally, check the box that lets you adjust the new composition’s duration to that of the layers it was created from.
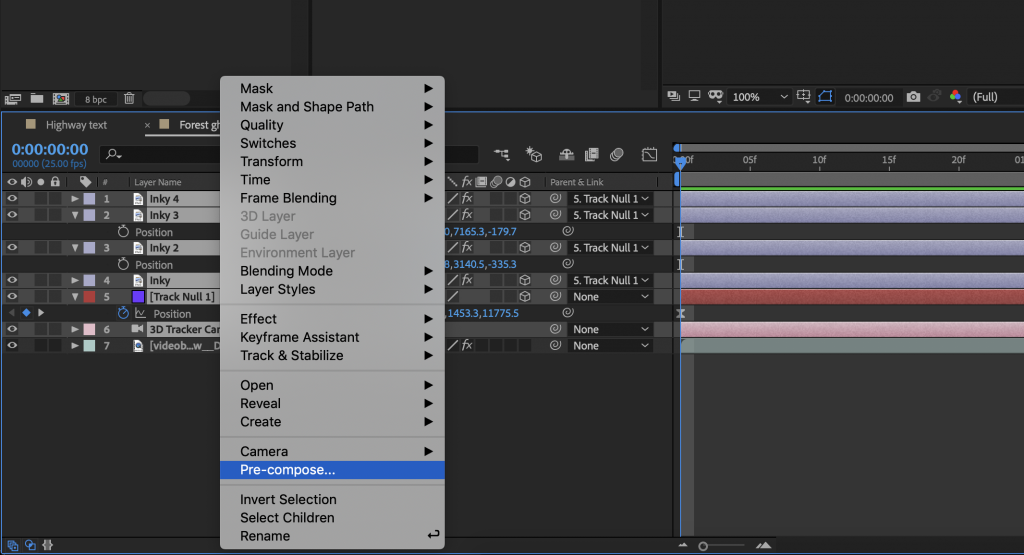
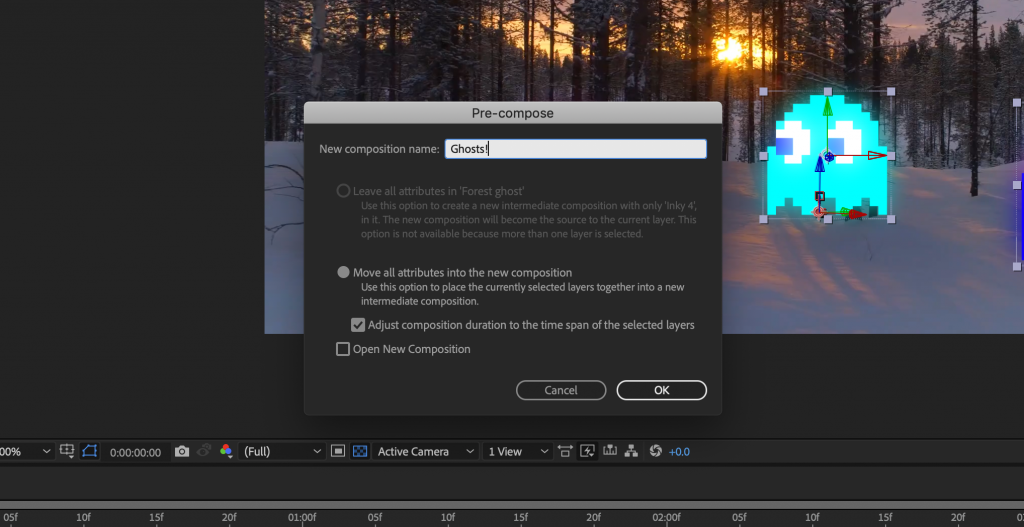
After you hit OK, the highlighted layers will be replaced with a single layer representing the newly created composition. The new composition will appear in your list of media, but you can also double-click on it from the timeline to open it and see the layers within it. Any changes you make to the layers in the new composition will show up wherever that composition appears.
